If you have ever played, or watched, a game of volleyball, you know that volleyball players are constantly jumping. They jump to spike, block, and serve the ball and they do this over and over again. Although I have already included a post about leg day and how to go about strengthening your legs, it is also beneficial to think strictly about jumping and how to improve you vertical.

slam dunk GIF
Source: NBA.com

Your vertical is what one refers to when they are talking about how high you can jump up into the air. As you can imagine, this is critical for athletes, especially volleyball players. Although some athletes are blessed with height, others have to work hard to be able to jump high. In order to improve your vertical jump, you must first have a baseline so that you can see/track your improvements and adjust accordingly. To measure your vertical, you will begin by standing on a flat surface with you side facing a wall. With your arm closest to the wall, you will stretch you arm up and mark the highest point you can touch on the wall. Next, you will jump as high as you can and mark where you can reach again on the wall. You then subtract you jumping reach from your standing reach to calculate your vertical jump. One you have this number calculated, you can begin your jump training and check back regularly to see your improvements.

S&C Essentials: Part 3 - Landing Mechanics | DoTraining and Performance LTD

Now that we have our baseline calculated, we can begin training. Training begins with something very simple and that is making sure you jumping and landing mechanics are bulletproof. This is important as it allows you to both jump higher and more efficiently as well as avoid injuries. Jumping and landing mechanics is something you can always practice because the more repetition you do, the more it becomes muscle memory. Practicing your form for jumping and landing is something that can be easily done anywhere. Things such as perfecting form through a standing jumping and repetitively practicing your volleyball approach with proper technique are going to benefit you in various ways. It is important however to be mentally awake and focussed while doing this. It is easy to get side tracked and think about other things when you are doing something repetitive like this, but the whole idea is to really focus on your form with each movement and critique it. You want to consider things like am I bending my knees? Are they tracking over my feet or are they caving in? Am I hinging at my hips and driving through when I jump? Am I swinging my arms effectively or am I doing extra unneeded movements? When I land am I balanced and is my weight spread evenly throughout both feet? These types of reflections will help bulletproof your jumping mechanics and help you jump higher and prevent injury.

Now that we have discussed the basics, it is time to discuss programs. There are countless jump training programs out there such as Vert Shock, Bounce Kit, Jump Manual and several more. These are great resources that I am sure are highly beneficial if you can afford them and have the time for them. Unfortunately, that is not the case for me. Instead, I have been doing research on vert training and trying to come up with my own workout routine. Although this may not be the most efficient workout, anything is better than nothing and I believe that the resources I have found can help me put together a program that I will see some improvements with.

When researching and pulling exercises together for my vert training routine, I used multiple resources:

After looking through various resources this is the workout I have come up with. Please keep in mind that this workout may need to change based on individual needs and may change for that individual as they improve. Also keep in mind that I am no elite jump training coach and can not provide a program such as the ones I listed earlier. This is simply what I am trying for myself based off of the research I have done. So here it is!

The Warmup:

  • 8 minute bike
  • Foam roll legs, glutes and hips
  • Loosen hip flexors by doing lacrosse ball hip flexor releases
  • Leg swings ( front and back, side to side)
  • Air squats (10-15 reps with bodyweight)

The Workout:
jump fitness GIF by CrossFit Inc.
Credit: CrossFit Inc.
  • Jump rope – 1 minute x2
  • Drop jumps – 5 sets of 5-6 reps
  • Banded approach jumps – 4 sets of 8 reps
  • Dumbbell snap down jumps – 5 sets of 3-5 reps *MAX EFFORT*
  • Pogo Jumps – 5 sets of 6-8 reps
  • Lateral jumps – 3 sets of 10 each leg
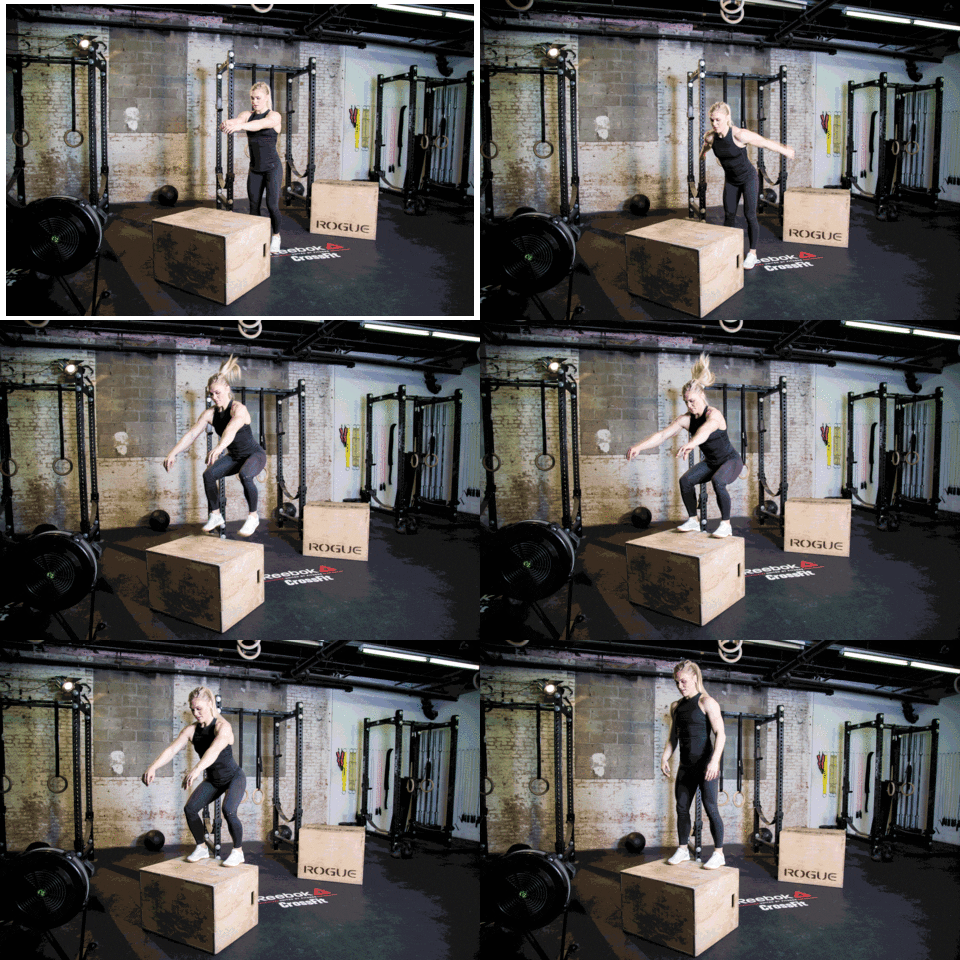
  • Box jumps – 5 sets of 5-6 reps
  • Jump rope – 1 minute x2

So there you have it! Go forth and jump, skip, and hop! I look forward to trying this out tomorrow and seeing the improvement in my vertical jump over the following weeks!!

Photo Credits: Header photo by Dylan Nolte on Unsplash

So far I have explored chest, triceps, back, biceps, legs, and core workouts. The only thing left to dive into is shoulders! Shoulders are often something we take for granted. Whether you are reaching over head to grab something on the top shelf at the grocery store or brushing your hair, you shoulder muscles play a pivotal role. This is especially true for athletes. Athletes you their shoulder muscle to swim laps, shoot a ball in basketball, bat a baseball, and more. For volleyball athletes, your shoulders are used vigorously and repetitively. Shoulders play a key role in moves such as hitting, serving, and even blocking. Without strong shoulders, you will inevitably be less efficient on the court.

So what are the benefits of having strong shoulders? The list is vast!

Strong shoulders result in:

  • Less injuries such as internal impingement and SLAP tears

– This is a result of increasing stabilization in muscles, ligaments, and tendons

  • Increased flexibility and shoulder health
  • Increased range of motion
  • Increased conditioning allowing your shoulder to last longer under strenuous activity
  • Enhanced posture
  • Increased hitting power
  • Increased arm swing speed
  • Aesthetic appeal

When considering how to properly and effectively strengthen your shoulders, it it critical consider a proper warmup. Without a proper warmup before a workout, especially with shoulders, it is very easy to injure yourself. In addition, for someone like me who has a previous shoulder injury, it is extra important to make sure you are properly warmed up

The Warmup:

Banded external rotations
  • 5 minute bike to get warm and get the blood flowing
  • Quick upper body roll out
  • Using a light resistance band do 10-15 internal and external rotations for both arms
  • Sleeper stretch
  • Using a light resistance band do 10 external rotations/arm at 90 degrees
  • Scapular wall slides
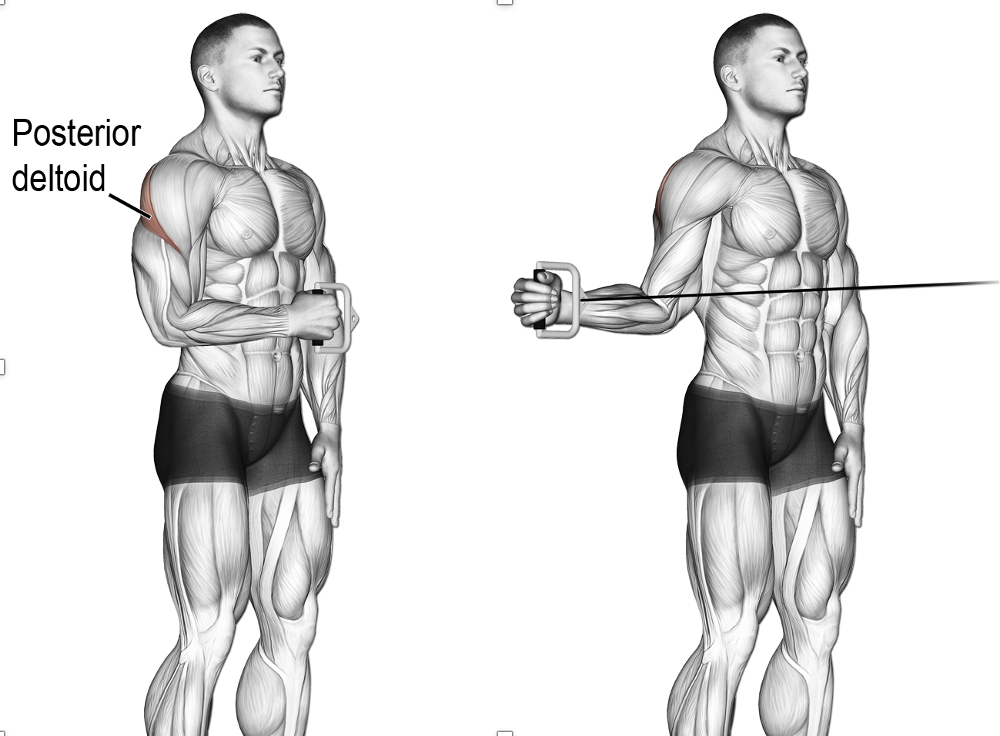
  • Using a light resistance band do banded pulls to warm up the back of your shoulders
  • Using a light resistance band do 10 shoulder opener repetitions

This warmup is an efficient and effective way to warm up your muscles as well as improve their mobility! This warmup should take around 15 minutes. After completing this you can begin the workout.

The Workout:

Rope face pulls
  • Y, T, W’s – 3 sets of 10 reps for each movement on each arm ( this can be done with light dumbbells, resistance bands, or body weight)
  • Front press 90 degree hold – 3 sets of 30 seconds/arm
  • Military press – 3 set of 6 reps
  • Seated dumbbell shoulder press – 4 sets of 10
  • Lateral raises – 3 sets of 10
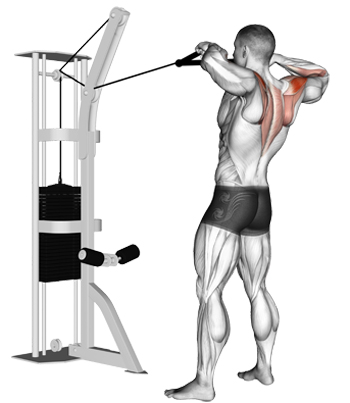
  • Rope face pulls – 3 set of 10
  • Plate squat to press burnout – 3 sets of 15 reps with 30 seconds rest in between

This workout is geared towards mobility, stability, and strength. It is a well rounded routine that will hit all these areas and improve shoulder efficiency in athletes. I will be trying this workout for this first time tomorrow afternoon when I hit the gym! I looked forward to feeling the burn.

Photo Credits: Header photo by Scott Webb on Unsplash

As you may have noticed, I took a little hiatus from my posts last week. I had an emergency surgery to get my wisdom teeth removed. There were some complications with the medications and what not but I am on the road to recovery now and back with some more information on how to become a better athlete!

In my last presentation, I had mentioned the core and how critical it is. I had said I would be diving into that deeper in its own blog post the following week; however, the wisdom teeth situation came up. So as promised, this week will be all about core! The benefits of having a strong core and how to get one. So let’s dive in!

step brothers abs GIF

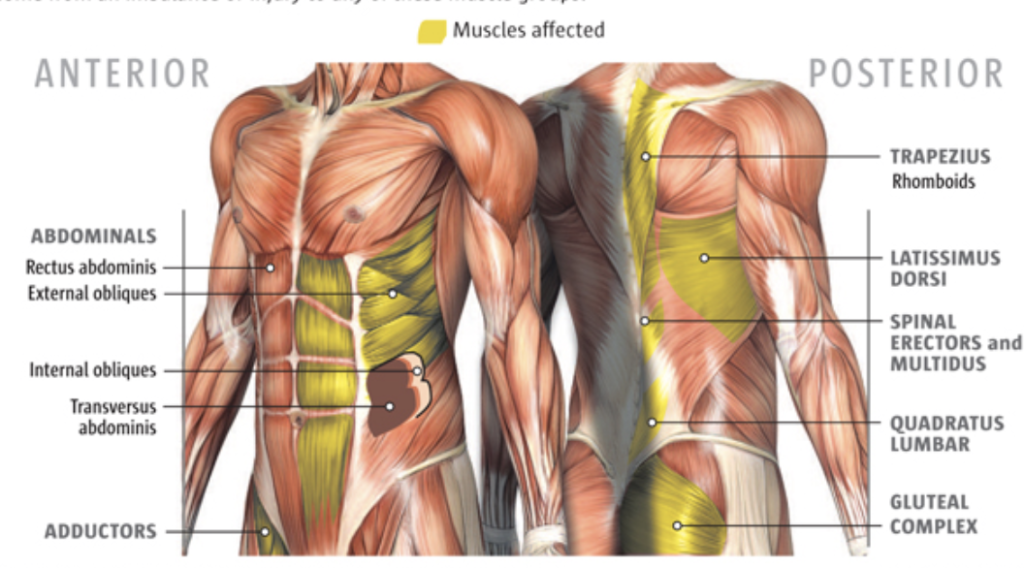
What is your core? Most people think of a six pack when they think of core but really, this is just the tip of the iceberg. The core actually wraps around your entire body and includes muscles on both you front and back side. These muscles include the pelvic floor muscles, transverses abdominis, multifidus, internal and external obliques, rectus abdominis, erector spinae and diaphragm, latissimus dorsi, gluteus maximus and trapezius. The core is

responsible for our stability and correcting muscles imbalance. This is critical, not just for athletes, but for everyone. Muscle imbalance means the you muscles are at varying levels of functionality, some are too loose, some are too tight, some are weak, and some are strong. When muscle balance occurs, injuries are like to occur. The core is responsible for spinal stability as well as preventing lower back, hip, knee, and neck pain. According to Andy Waldhem, who has his Doctorate of Philosophy in Kinesiology, there are “five different components of core stability: strength, endurance, flexibility, motor control, and function”. Waldhem believes that the first step to a strong core is developing proper motor control and function. Without this stability, are spine is left unprotected. After this, we move in other areas such as strengthening the core.

When considering the core in relation to athletes, there are some specific benefits worth mentioning. A strong core helps athletes:

  • Control their body position
  • Generate optimum power
  • Transfer force efficiently throughout their body
  • Improve rotational movements (such as spiking a volleyball)
  • Improve balance which allows them to hold body positions for an extended periods of time
  • Gain greater efficiency within movements (ie: you won’t waste as much movement in defence)
  • Improve core strength which results in improved stabilizing muscles. This allows for optimal muscle growth and strength in all other body parts
  • Increase flexibility
  • Prevent injuries

So now that we know what the core is, what it does, and why it is important, how do we train it? I have put together a workout after looking through countless resources and talking with trainers and this is what I have come up with!

The Workout:

In this workout you will have groupings of exercises that you repeat back to back with a short rest in-between round a longer rest between groupings.

Group 1:

  • Medicine ball dead bugs – 3 sets of 15-20 reps on each side
  • Lateral Crawl – 3 sets of 6 repetitions.
  • Squat and Press – 3 sets of 8-12 reps

Group 2:

  • Ab roller – 3 sets of 6-8 reps
  • Pallof press – 3 sets of 20 second holds on each side
  • Prone med ball toss – 3 sets of 8-12 reps

Group 3:

  • Stir the pot – 3 sets of 8 reps in each direction
  • Plank – 3 sets of 1 minute
  • Oblique plank on bench – 3 sets of 15-20 seconds on each side without moving **NOTE: This exercise requires a partner to hold your legs!**

So there it is! Get working those cores! I know I will be in the next couple days here when I can resume regular physical activity. I have my checkup tomorrow afternoon for my wisdom teeth and hopefully I will get the all clear so I can resume my workouts! Happy crunching!

*Quick side note: On the technology side of things, I am super excited as I finally figured out how to get my text to wrap around photos!! I have been trying to figure this out for awhile. It is really simple, can’t believe I didn’t figure it out sooner. Better later than never though!*

Photo Credits: Header photo by Jonathan Borba on Unsplash

This week I am looking into one of the most critical parts of being a high intensity athlete. In order for your muscles to recover, your body to function optimally, and your achieve gains in your muscles, you bust rest and actively focus on recovery. Recovery consists of two categories: 1. Immediate or short-term recovery and 2. Long-term recovery. Short term recovery occurs within hours of physical activity. This includes things such as low intensity exercise after working out and during the cool down phase. Long-term recovery is anything that comes after this. This can include things that are built into your reoccurring schedule, such as a recovery day or regular yoga sessions, or things you do after physical activity in attempt to jump start your recovery, such as rolling and ice baths.

From past experiences, research, and talking with different coaches and personal trainers, here some ways to jump start recovery and repair your body:

  1. Sleep!! The deep stages of sleep cause an increase in blood flow which brings oxygen and nutrients that repair muscles and regenerate cells. In addition, while we sleep a hormone called growth hormone is released. This hormone stimulate muscle repair and growth. On top of this, prolactin (which is another hormone) is also released. This hormone helps regulate and reduce inflammation. Overall, sleep is one of the most important parts of recovery as, “Muscles and tissues repair and rejuvenate as we sleep.”
  1. Refuel right after activity – The sooner you can eat and drink after training, the faster your body will start to recover. Replenishing your body is critical in order for your body to have the ingredients in needs to recover. Eating within 20 minutes of finishing a workout will greatly aid in your recovery.
  2. Reflecting on how you feel – Reflecting on how you feel is a good way to spot problems early. Things such as your mood, energy levels, sleep quality, how your muscles feel etc. are all things that can indicate if you are getting enough rest, if you are getting sick, and if you need a break
  1. Hydrate and replace electrolytes  When you sweat, you lose water and a lot of electrolytes. Being properly hydrated helps flush out toxins, transport nutrients into the cells, regulate body temperature and pH balance, and help with muscle soreness and stiffness.
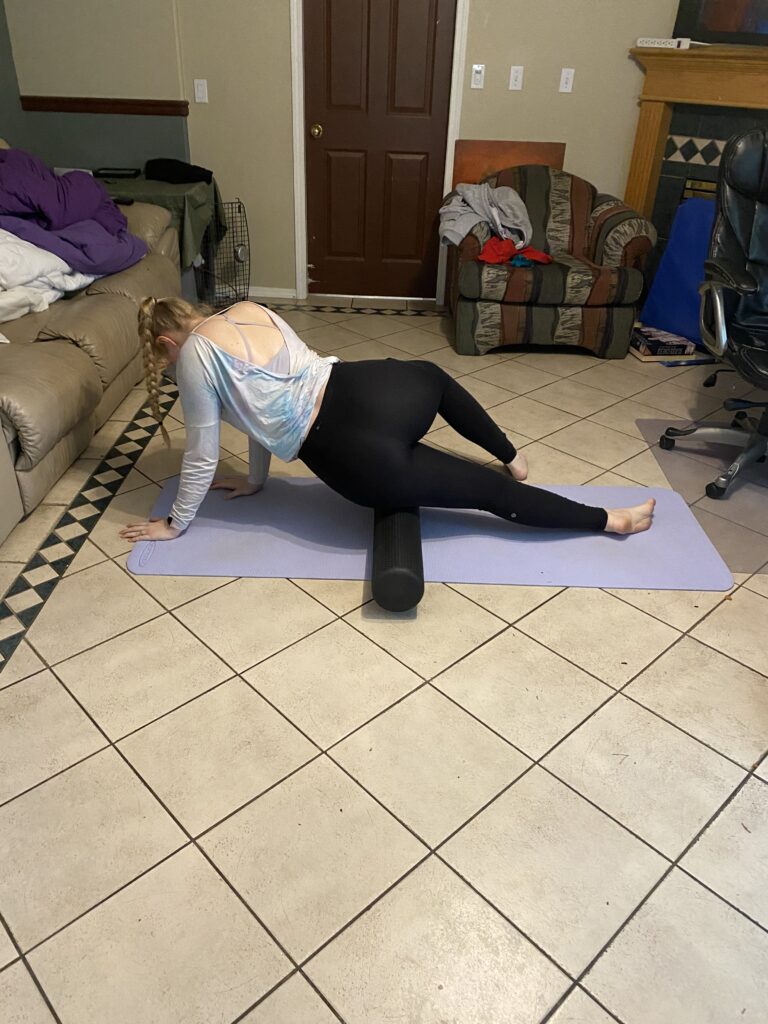
  2. Practice foam rolling – Foam rolling triggers the sudden relaxation of muscles by applying tension to the tight spot. Rolling help bring blood to the muscles, stretch and lengthen them, and improve range of motion and flexibility which can prevent injuries
  3. Enjoy an infrared sauna 30-minute session one to three times per week is great for minimizing pain and loosening muscles. “Infrared light penetrates the skin to stimulate cells’ mitochondria and expedite healing. It’s especially good for soft tissue, which includes ligaments and tendons that are slow to heal because they don’t get a lot of nutrients.”
  4. Icing, ice baths, and cold showers – Icing help reduce swelling and flush out lactic acid in the muscles which aids in recovery
  5. Stretching and yoga!

Without proper recovery, you cannot repair your body, gain muscle, or be an optimal athlete. Because of this I decided to start doing yoga this week on top of my other routine recovery procedures which include foam rolling, icing, and more. Here is a short video below of me working through a yoga flow to improve my flexibility, range of motion, and overall recovery!

Created using EZGIF.com

Photo Credits: Header photo by LOGAN WEAVER

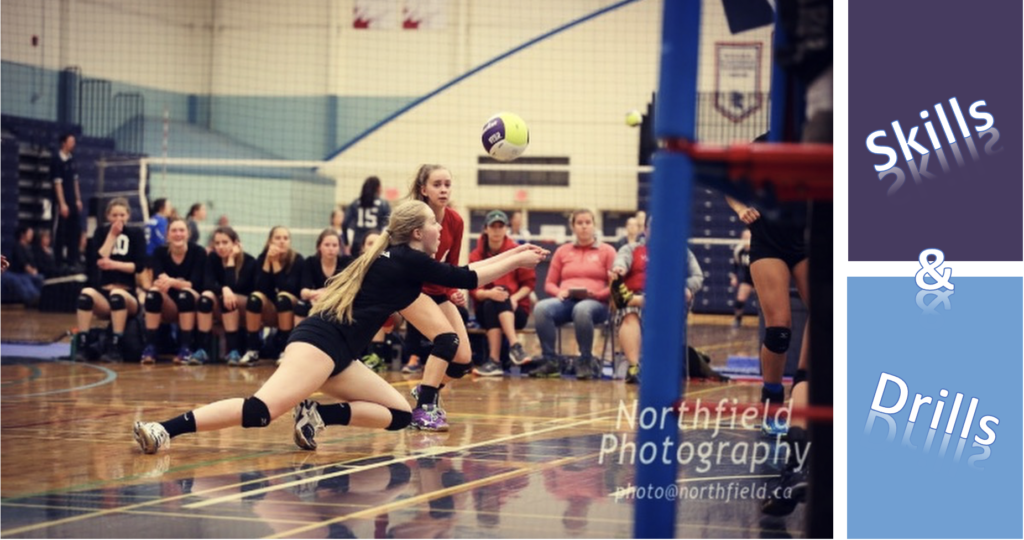
As much as focussing on weightlifting and health is important, the only way to become a great player is by practice. Research has shown that it takes a certain number of repetitions to master a skill, not a specific amount of time. This means in order to really master a skill you need to do it over and over again. In addition, deliberate learning is another key to succeeds. Deliberate learning focusses on working on a narrow subset of skills required for the bigger picture. In terms of volleyball, this means practicing each skill on its own and focussing on each part of the separate skills. These training tips are key to developing your skills to the max.

For volleyball this consists of doing reps for passing, setting, hitting, serving, and blocking. This is slightly difficult during Covid; however, in this post I am exploring some of the drills you can do while home alone.

Drills for Skill Development:

  • Passing up against a wall
  • Setting up against a wall
  • Hitting into a wall
  • Serve against a wall
  • Hitting footwork
  • Torque practice (in a chair)
  • Blocking footwork
  • Repeated bumping to yourself
  • Repeated setting to yourself
  • Bump to set drill
  • Setting into a basketball net
  • Serving toss practice
  • Setting laying down
  • Setting between your legs
  • Serving with a serving band
  • Pepper against a wall
  • Single arm passing
  • Arm swing repetitions
  • Wall traps

Resources:

Here are a few short clips me working on a couple of these drills myself!

Practice, practice, practice! I look forward to seeing how my skills progress by practicing these drills over the following weeks! Perfect practice makes perfect!

Leaping Legs

Today we are talking about leg day!! I personally have a love/hate relationship with leg day. It is hard work but it is so worth it. Leg day is extremely important for volleyball players in order to avoid injuries, improve explosiveness and speed, and to increase your vertical. All these aspects are key to being a good volleyball player. In order to optimize your leg strength training, professionals say it is important to focus on explosive leg movements/exercises as these translate specifically to the sport. After mulling through the resources I posted in my earlier blog, and talking to some trusted mentors (volleyball coaches and personal trainers), I put together a workout that will aim to improve and optimize my leg strength.

The Warm-Up:

  • 5-7 minutes of biking
  • Full body foam rolling (back, shoulders, glutes, hamstrings, quads, IT band, calves)
  • Thoracic spine rotations
  • Leg swings and straight leg kicks

This warmup should take around 15 minutes and is critical for getting the muscles warmed up and ready to lift heavy weight. If a proper warm up is not executed, there is a very good chance you will injure yourself. In addition, it is proven that you get better results from your workouts when you are properly warmed up. Sources say that when you warmup, your muscles work more efficiently, it improves the load distribution in your joints, lowers viscous resistance in muscles, results in faster muscles contraction and relaxation in muscles, and more.

The Workout:

  • Squats – 2 warmup sets, 3 sets of 8 reps
  • Romain deadlifts – 3 sets of 8 reps
  • Hip thrusts – 4 sets of 8 reps
  • Lunges – 4 sets of 6 reps/leg
  • Kettlebell swings superset with jump squats – 3 sets of 10 reps
  • Side lunges (8 reps/leg) superset with lateral jumps (10 jumps/leg) – 3 sets
  • Box jumps – 3 sets of 5 reps

The Cool Down:

  • Standing quad stretch
  • Crossover hamstring stretch
  • Figure 4 stretch
  • Butterfly pose
  • Seated twist stretch
  • Pretzel stretch
  • Inner thigh side lunge stretch
  • Pigeon stretch

Stretching after a workout is extremely important in order to promote recovery, reduce muscle tightness, eliminate lactic acid, improve blood circulation, and more. In addition to all these benefits, it also improves your flexibility and range of motion which can help you be more efficient in future workouts and can help further your athleticism. In order for stretches to be effective you need to hold them for 15-20 seconds. This means that your cool down should take approximately 5 minutes.

I did this workout on Monday at it was killer. I am so sore and probably won’t be able to walk properly till next Monday; however, it is clearly working. I can’t wait to see the results in a few weeks!

Photo Credits: Header photo by Meghan Holmes

This week, instead of talking about workouts I wanted to switch it up and talk about nutrition. I had a meeting with a specialist this week where we talked about what my specific nutrition needs are in order to be able to gain lean muscle mass, build strength, and play optimally and efficiently. This includes what food I eat, how much I eat, and how much water I drink each day.

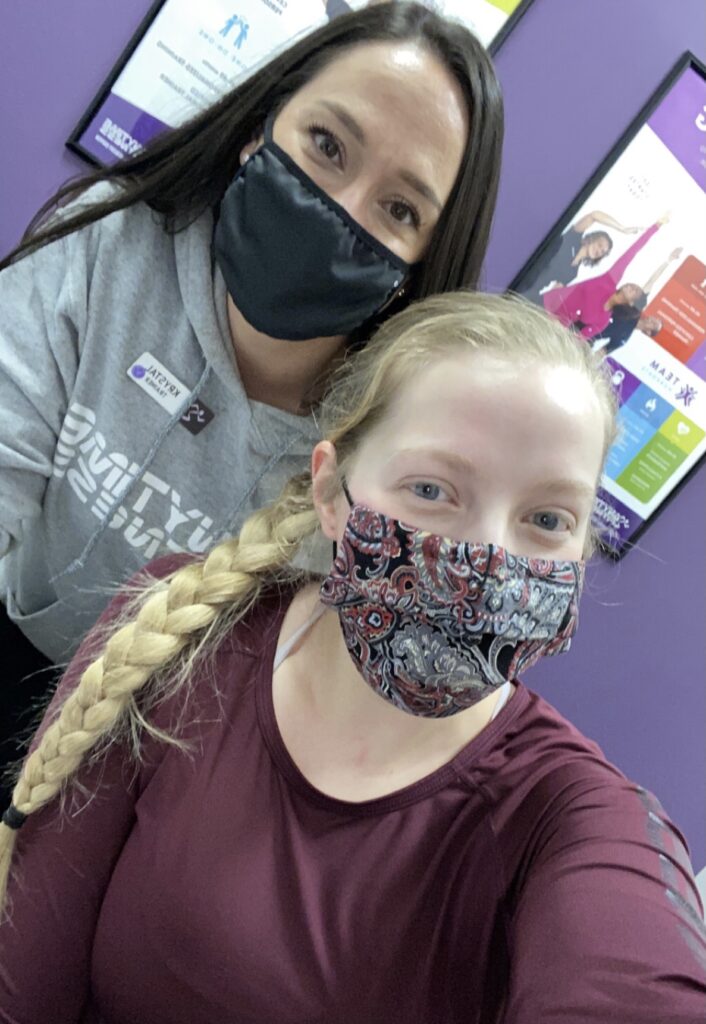
At the beginning of our session, Krystal had me do a bioscan on the Evolt 360 machine. This machine uses electrical currents to measure the difference between muscle mass, fat mass, water, and minerals in your body. It also takes into account height, weight, age, and other factors as well. The science and research behind the Evolt 360 machine is extensive and well respected. I have linked the website here in case you are interested at looking into it more. After a quick scan, you are provided with over 40 measurement that include, but are not limited to, lean body mass, body fat mass, visceral fat mass, skeletal muscle mass, total body water, and BMR which stands for basil metabolic rate. BMR is one of the most important factors on this list. It tells us the number of calories you body needs to function when you are not doing any activity at all. With this number you can then go on to calculate how many calories you need with your particular activity level in mind.

Me with my holistic nutritionist, Krystal

Once I had my scan done, Krystal calculated my numbers to figure out how many calories I need to eat in a day and what my macros are. Macros refer to specific nutrients that your body requires to function and perform – proteins, carbs, and fats. After calculating my number we determined that I need to eat 2,700 calories. Of these calories 40% need to be proteins, and 30% for both carbs and fats. After finding these numbers, we talked in depth about each of the macronutrients and what I could eat to accomplish these goals. I could go into very specific details about this but instead I am just going to list a few of the suggested foods. These food include, eggs (specifically egg whites), meat such as chicken, beef, and fish, oats and/or oatmeal, greek yogurt, nuts, vegetables and fruits, and protein powder.

This session was critical to my inquiry as nutrition plays major role in muscle recovery, injury prevention, reduced tiredness, increased focus and alertness, building muscle, and ultimately, reaching peak performance. I look forward to taking this knowledge and implementing it into my everyday life!

Photo Credits: Header photo by Brooke Lark on Unsplash

JUMPING INTO THE

WEIGHT ROOM

To kick off my inquiry project I am jumping right into the weight room and looking at volleyball specific exercises! Over the next couple of posts I will be laying out a chest/tricep workout, back/bicep workout, shoulder workout, and leg workout that caters to volleyball and the specific skills and movements patterns that take place in this sport. In order to do this efficiently, I have spent time looking into resources and talking with some professionals about what exercises are effective and why.

Some of the resources I used when researching volleyball strength training were:

  • The Art of Coaching Volleyball – this is a very well-known and respected community of high level volleyball coaches and players who post tips for everything from strength training to drills to mental preparation to strategy and more. Some the people who are active in this community include Karch Kirlay (Mens USA National Team coach), Russ Rose (the coach of Penn State), John Dunning (coach of Stanford and 5 time national champion), and more.
  • Volleyball Training 101 – Contains many articles with overall health and performance tips but also specific volleyball related articles written by kinesiology graduates that special in strength and performance training.
  • Reid’s Workouts – Reid Hall is a former national player and now dedicates his time to training elite university level teams and individual athletes. He has an honours degree in kinesiology and health sciences from York University and is a 4 time winner of the Sports Excellence Award. He is well respected and very knowledgable in volleyball and strength training.

After diving into some of these resources I put together a workout plan with my coach that I then performed at the gym. My workout plan for “chest/tricep day” consisted of:

  • Dumbbell chest press – 4 sets of 8 reps
  • Dumbbell pullovers – 4 sets of 8 reps
  • Incline dumbbell chest press – 4 sets of 8 reps
  • Chest flys – 4 sets of 8 reps
  • Pushups – 3 sets of 10 reps
  • Dips – 3 sets of 8 reps
  • Tricep rope extensions – 3 sets of 10 reps
  • Skull crushers – 3 sets of 12 reps

Training chest is vital for volleyball players. There is many benefits to training chest such as strengthened back muscles, stability and injury prevention, and the ability to perform swinging movements harder and faster. Overall this workout went really well for me and I am excited to see the benefits that come from it!

Photo Credits: Header photo by Danielle Cerullo on Unsplash

Free Inquiry: Initial Spark and Questions

When choosing a topic for my inquiry project, it wasn’t a difficult choice. I was instantly drawn towards a health and fitness inspired blog as it is something that has always sparked my interest and can always be improved upon. When beginning this project I looked at the diagram below to help me figure out what to consider and how to go about the project. In this first post I will be exploring the “I Wonder” block by going over my initial thoughts and questions.

For this inquiry I am hoping to explore health and fitness in the sense of being an athlete. I want to dive into the question of how can focussing on my health and fitness make me the best volleyball player possible. With this topic I will be considering things like:

  • What exercises are best for volleyball players?
  • How often should you work out?
  • What role does cardio and jump training play in making me better?
  • How important is recovery? What does recovery consist of?
  • How does eating affect my performance? What foods should I be eating? How much should I be eating?
  • How does watching game play help improve your skills?
  • What affect does sleep have on performance?
  • What volleyball specific drills will help me become the best player I can be?

Now that my questions are laid out, it is important that I consider how I will go about the rest of the project. With these questions in mind, I plan on exploring the investigate, record, discover, think, and try blocks of the diagram above. For the investigate and record blocks, I will do research on my different questions and begin formulating ideas. For the discover block, I will observe and examine different volleyball players, game play, ways of training etc. For the I think and I try blocks, I will relate my findings to myself and put them into practice (as much as possible). Finally, the reflect block will be my blog posts where I post my own journey and experiences and reflect on the outcomes. These posts will include pictures/videos of me taking on exercises, looking into nutrition, dealing with recovery techniques and more. It will also include some of the research I have gathered and links to sources that have guided my journey. The blog posts will also be a place for me to consider how I can change and improve things and ask any further questions that may come up. Overall, with this blog my ultimate hope is to figure out something new about myself and further my health, fitness, and volleyball journey!

Photo Credits: Cover photo by Victor Freitas & Diagram photo by Brynn Courtney