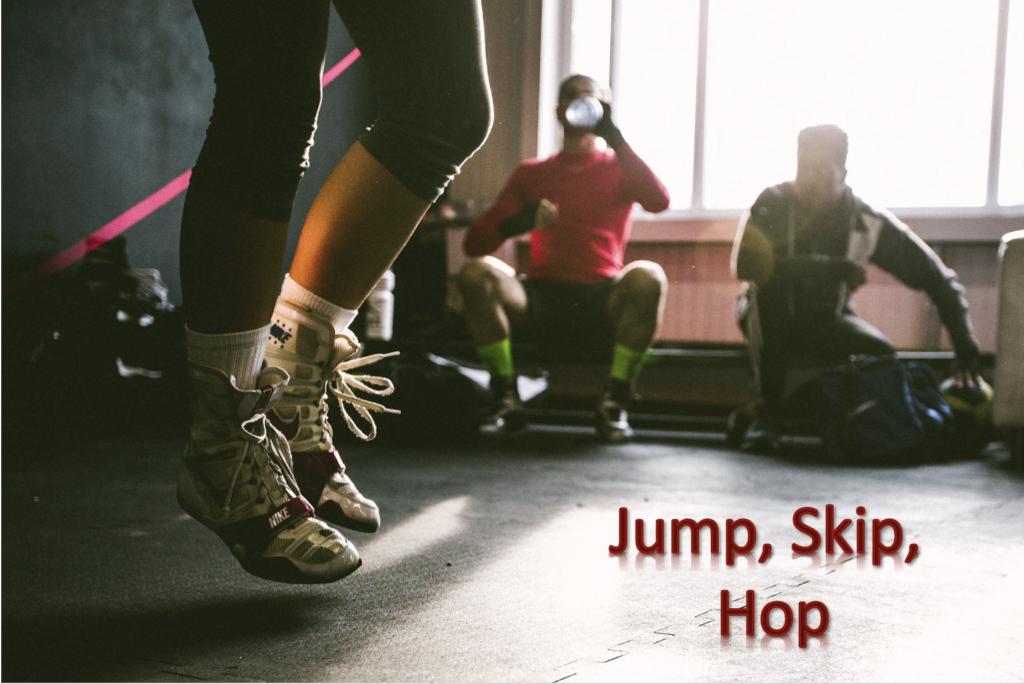
If you have ever played, or watched, a game of volleyball, you know that volleyball players are constantly jumping. They jump to spike, block, and serve the ball and they do this over and over again. Although I have already included a post about leg day and how to go about strengthening your legs, it is also beneficial to think strictly about jumping and how to improve you vertical.

slam dunk GIF
Source: NBA.com

Your vertical is what one refers to when they are talking about how high you can jump up into the air. As you can imagine, this is critical for athletes, especially volleyball players. Although some athletes are blessed with height, others have to work hard to be able to jump high. In order to improve your vertical jump, you must first have a baseline so that you can see/track your improvements and adjust accordingly. To measure your vertical, you will begin by standing on a flat surface with you side facing a wall. With your arm closest to the wall, you will stretch you arm up and mark the highest point you can touch on the wall. Next, you will jump as high as you can and mark where you can reach again on the wall. You then subtract you jumping reach from your standing reach to calculate your vertical jump. One you have this number calculated, you can begin your jump training and check back regularly to see your improvements.

S&C Essentials: Part 3 - Landing Mechanics | DoTraining and Performance LTD

Now that we have our baseline calculated, we can begin training. Training begins with something very simple and that is making sure you jumping and landing mechanics are bulletproof. This is important as it allows you to both jump higher and more efficiently as well as avoid injuries. Jumping and landing mechanics is something you can always practice because the more repetition you do, the more it becomes muscle memory. Practicing your form for jumping and landing is something that can be easily done anywhere. Things such as perfecting form through a standing jumping and repetitively practicing your volleyball approach with proper technique are going to benefit you in various ways. It is important however to be mentally awake and focussed while doing this. It is easy to get side tracked and think about other things when you are doing something repetitive like this, but the whole idea is to really focus on your form with each movement and critique it. You want to consider things like am I bending my knees? Are they tracking over my feet or are they caving in? Am I hinging at my hips and driving through when I jump? Am I swinging my arms effectively or am I doing extra unneeded movements? When I land am I balanced and is my weight spread evenly throughout both feet? These types of reflections will help bulletproof your jumping mechanics and help you jump higher and prevent injury.

Now that we have discussed the basics, it is time to discuss programs. There are countless jump training programs out there such as Vert Shock, Bounce Kit, Jump Manual and several more. These are great resources that I am sure are highly beneficial if you can afford them and have the time for them. Unfortunately, that is not the case for me. Instead, I have been doing research on vert training and trying to come up with my own workout routine. Although this may not be the most efficient workout, anything is better than nothing and I believe that the resources I have found can help me put together a program that I will see some improvements with.

When researching and pulling exercises together for my vert training routine, I used multiple resources:

After looking through various resources this is the workout I have come up with. Please keep in mind that this workout may need to change based on individual needs and may change for that individual as they improve. Also keep in mind that I am no elite jump training coach and can not provide a program such as the ones I listed earlier. This is simply what I am trying for myself based off of the research I have done. So here it is!

The Warmup:

  • 8 minute bike
  • Foam roll legs, glutes and hips
  • Loosen hip flexors by doing lacrosse ball hip flexor releases
  • Leg swings ( front and back, side to side)
  • Air squats (10-15 reps with bodyweight)

The Workout:
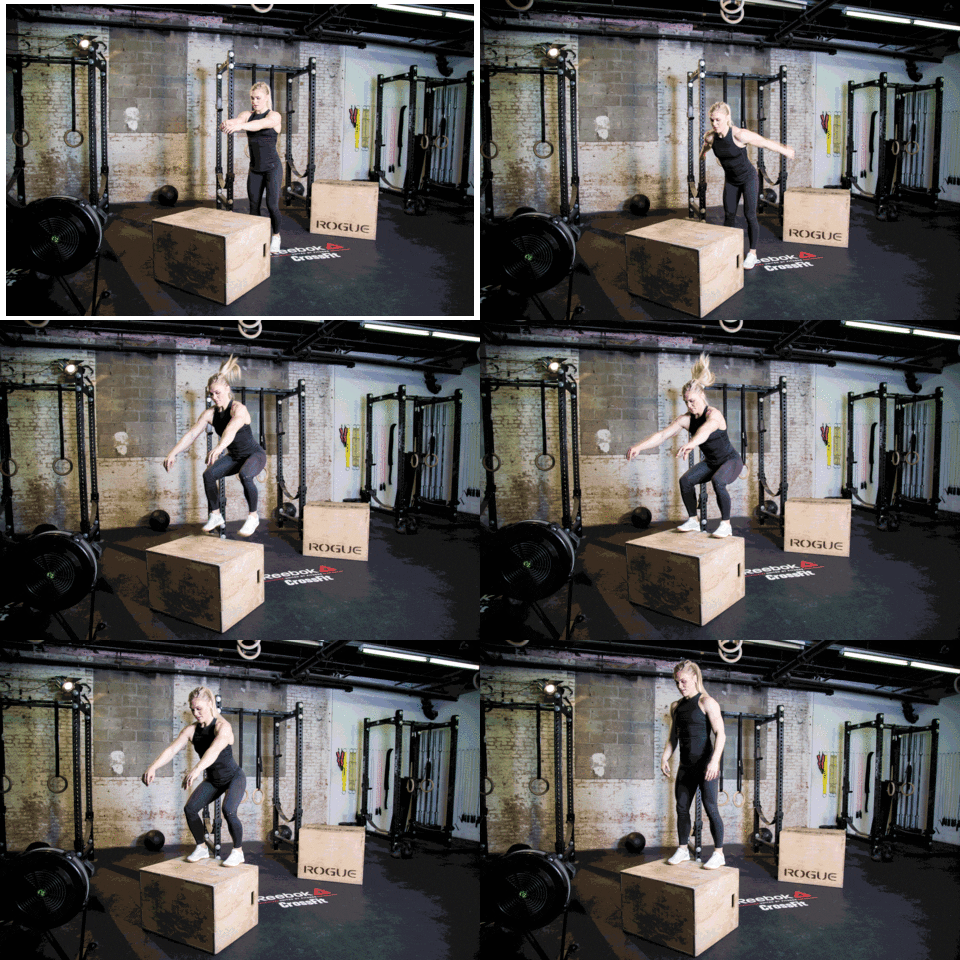
jump fitness GIF by CrossFit Inc.
Credit: CrossFit Inc.
  • Jump rope – 1 minute x2
  • Drop jumps – 5 sets of 5-6 reps
  • Banded approach jumps – 4 sets of 8 reps
  • Dumbbell snap down jumps – 5 sets of 3-5 reps *MAX EFFORT*
  • Pogo Jumps – 5 sets of 6-8 reps
  • Lateral jumps – 3 sets of 10 each leg
  • Box jumps – 5 sets of 5-6 reps
  • Jump rope – 1 minute x2

So there you have it! Go forth and jump, skip, and hop! I look forward to trying this out tomorrow and seeing the improvement in my vertical jump over the following weeks!!

Photo Credits: Header photo by Dylan Nolte on Unsplash

Coding. What, where, why, when, how? Coding is something completely new to many of us. This is something that is becoming more and more common to the point where there is provincial sites that relate coding to the curriculum. So if coding is become more common, how can we get on board and what basics do we need to know in order to wrap our head around this new concept?

What?

Put simply, coding is how we communicate with computers. We give computers instructions and they turn these instructions into games, apps, movies, and more. For kids, this doesn’t necessarily look like the confusing type of coding you may be imagining. Coding has a variety of levels so kids can start at a level where they feel comfortable. This can look like visual block coding, which can be seen in resources like Scratch, and can get progressively more complex to where they are working with typing and syntax.

Where and When?

With the growing interest in coding, and the readily available resources, coding can be done almost anywhere at anytime! Coding can be done on a computer, iPad, phone etc. It can also be done both at home and at school! There are many growing programs and platforms both online and in schools that kids can take advantage of if they are interested in coding.

Why?

Coding has various benefits for kids! First off, coding can help improve problem-solving skills, cultivate technological literacy, foster creativity, improves organizational skills, teaches logic, promotes independent learning, improves communication and collaboration, encourages persistence, and more! In addition to these benefits, coding can also help kids understand the world better. Finally, coding can be fun, satisfying, and rewarding! When kids code they can make beautiful artwork, create a website or fun games, and more. This new world is an adventure and opportunity that many children strive in and enjoy.

How?

As I mentioned above, coding can look different depending on the age of individuals and their personal readiness and prior knowledge of coding. Because of this I think the most beneficial way to answer this question is by listing some resources that you can access:

So there you have it! Coding can be fun and easy for children and has many benefits! With the changing times, it is important that we consider coding and how to utilize it as it is becoming more and more popular.

Photo Credits: Header photo by Rick Kimotho on Unsplash

Todays class was all about educational video. It is crazy to think about how much we rely on video for things from cooking tutorials, to helping us with math problems, to figuring out how to fix our cars. Videos can be a great educational resource and enhance often enhance the learning experience and our understanding of concepts. So how do we create these educational videos? And how do we incorporate videos in an effective way?

There are countless way to create educational videos. You can use programs such as screencastify, iMovie, Camtasia, Quicktime, and more. All these programs are great ways to create educational video; however the thing that stood out to me in the section of the lesson was actually the tips to recording a successful video. One of think links Michael shared with us an edutopia blog about making your own instructional videos. This resource provides some tips that I think are extremely important when making educational videos.

1. Chunk Instruction - You can only truly keep your viewers attention for so long so keep videos short, sweet, and to the point!
2. Build video ready slides - Create slides that are clear, simple, and visually appealing. This is the most effective way to keep attention and explain your points effectively.
3. Enhance Engagement - Imbed way for participants to engage such as questions and activities
4. Be Yourself - Relax, breathe, and don't be afraid to mess up! Natural, conversational speaking is more engaging, and being personable is key.

I think these tips are great and are things that I personally need to remember if I am creating educational video. I particularly like the tip about chunking instruction as it is critical to remember how long you can really keep your audiences attention for. I also think the tip about being yourself is very relevant to me as I often get very nervous recording myself.

In addition to creating educational videos, we also talked about how to effectively incorporate video. This included learning how to imbed videos into your work properly, linking a video to a particular section, turning on closed captions, and changing the speed a video plays at. The thing that stood out most to me was linking a video and being able to have it start at specific section. I did not know this was possible! So useful! I have incorporated a YouTube video below to display this new skill I have gained. I can also confidently say that I now know how to used closed caption and change the speed of videos. All really useful things to know.

Finally, one cool thing that I was inspired to try out after todays class was creating a gif. It is nothing special but here is a gif I created using Animated Gif Maker!

Photo Credits: Header photo by Thomas Russell

Today we had the pleasure of working with guest speaker Trevor MacKenzie. Trevor is a teacher in Victoria who is known for his passion and work with inquiry-based learning. It was kind of a coincidence that Trevor was our guest speaker this week as I just followed him on Instagram a few days ago and was telling my partner about his great work. I did not realize at the time that he was going to be out guest speaker for today so I was pleasantly surprised when I got to class.  I really enjoyed todays session and felt like there was so much valuable information.

One thing that Trevor said that really stood out to me is that engagement matters. Student engagement is key and you should constantly be scanning the classroom to check for student engagement and interest. Trevor also stated that the power of the visual is a really great way to capture this engagement. He said that provocations, which can be videos, pictures, gifs, field trips, compelling text etc., are a critical way of grabbing student interest, stirring curiosity, sparking wonder in a particular topic, and getting people thinking. He showed us some great examples of provocations such as the one that reflected dictatorship. After the introduction to provocations, we talked about thinking routines and the questions you can ask students about provocations. Trevor’s model consisted of these questions: What do you notice? What do you wonder? What do you know? I think this is a really great way to get everyone involved and actively engaged in the process of wondering before introducing prior knowledge. It allows all students the chance to think, question, and marvel at something before accessing prior knowledge from the class, and it gets everyone engaged and participating.

A question that was posed by a fellow classmate also really caught my attention. They asked how inquiry-based learning affects students who have learning disabilities. I thought that this was a very interesting question and I had not thought about it. Trevor had a really cool answer, he said that in inquiry-based learning it allows us to sit down with individuals and get that one-on-one time with them. We are actually better able to cater to individuals specific needs as inquiry-based learning in conducive to individualized learning and open to working through projects in different ways. An even cooler note that he mentioned was that inquiry often helps “dull” disabilities. Through this type of learning, students learn how to be independent and how to cope with their personal struggles. It allows them to figure out how to work around, or with, their disabilities so that they can succeed despite these struggles. I thought this was so cool as classrooms are full of diverse learners and it is important that we do our best to support all of them.

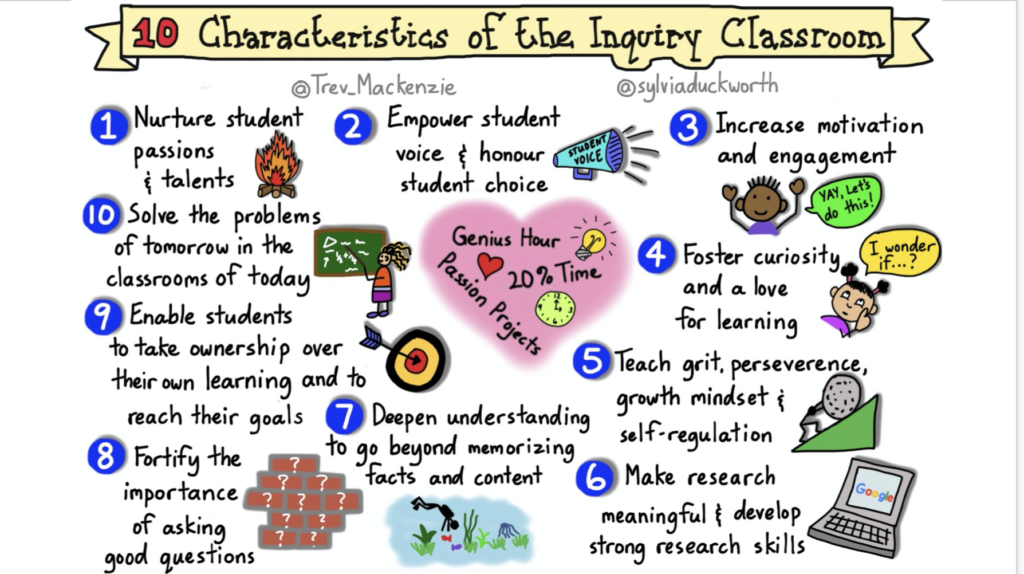
Trevor provided us with some great resources today and one that I really liked was the “Characteristics of the Inquiry Classroom” poster. I found this poster to be a great tool for personal reflection as well as a great source of inspiration. It helps us think critically about what some of our strengths may be and what we can improve on and work towards. It is also a great way to easily see some of the benefits that come out of inquiry-based learning. This poster really promotes a growth mindset for me personally which I think is so important as a future teacher! As future teachers, we want to model having a growth mindset and constantly work towards bettering ourselves and expanding our knowledge. This poster does exactly that for me! I also really appreciated the break out room for this section and being able to talk with fellow students about what they feel some of our strengths are and where we would like to improve. After returning from these breakout rooms, Trevor also mentioned how these characteristics are used to develop 7 specific competencies in students: critical thinking, collaboration, communication, curiosity, creativity, self-control, and empathy. These competencies really stuck out to me and I can see myself really utilizing them in the future. I envision posters of these around my classroom as well as projects that work to develop these competencies in my students. This resource really struck a chord with me and inspired me.

“Enable students to take ownership over their own learning and to reach their goals.”

– Trevor MacKenzie & Sylvia Duckworth

The last thing I want to touch on in this blog post is some resources either by Trevor himself, or that he suggested. I will briefly list them here for future reference and for any others who may want to find/use them!

Photo Credits: Header photo by Diego PH on Unsplash

Todays class was lead by guest speaker Jesse Miller who discussed the cautionary tale of social media. Although I was not in class today due to illness, I was still able to gather plenty of useful information after reviewing Jesse’s slides about the use of social media. After viewing and reflecting on the slides, I think it is very important to realize boundaries when it comes to social media. First, there is the importance of realizing that the things we post on social media are often visible to the public. It is crucial that we make sure the things we are sharing online are appropriate and professional. It is a good idea to keep your personal and professional social media platforms separate and make sure your privacy settings are set to adequate levels. Another boundary worth considering is adding students on social media. This is not something to consider but a boundary that should be followed for the safety and integrity of you and your students.

Although it is important to be cautious when using social media, social media does have many benefits. For example, some teachers use their platforms to share activities, ideas, educational resources, and more. In addition, social media can be a way to easily access information and knowledge. When used right, social media, and media in general, have its place in the classroom and as a tool for individuals to use responsibility.

Lastly is the idea of our personal social media footprint. For the most part what I expected to see was what I saw however there was one or two things that surprised me that I plan on looking into. One of these being a LinkedIn account of me that I never created. Overall, I think social media is a tool that should be used carefully and that means ensuring your privacy setting are set and that you are promoting yourself appropriately.

Photo credits: Header photo by Merakist on Unsplash

Week 3 Reflection

In this weeks class we talked about multimedia and how its use can aid in the learning process. Media, if used correctly and efficiently, can spark individuals interest in a topic and further their understanding and comprehension on topics. Some of the tools that were discussed for creating media were Prisma, Mirror Lab, 8Bit Photo, Photoshop, and PowerPoint. We talked about things how to crop images, resize them, add in shapes and other images to existing photos, create various charts etc.

After discussing some of these platforms we got to go into breakout rooms and play around with them. We were put in breakout rooms where we got to experiment with PowerPoint. I attempted creating a cover photo where I edited in some text and experiments with the shape of it, I created a small graphic chart using SmartArt, and I attempted to edit Bernie Sander into a game of wizards chess with Ron Weasley. Here are the outcomes!

Overall, this class was highly entertaining, extremely fun, and very useful. It was nice to have the chance to clarify some questions I’ve had for years about how to do accomplish certain aspects of editing such as how to save images you’ve created off of PowerPoint. I think this will be really useful in my other classes as well as in my future work as an educator!

Week 2 Reflection

When thinking back on this weeks class and tasks there are a couple of things I think are worth reflecting on. The first thing I want to reflect on was the discussion and resources we were provided with on copyright. Personally, I have always known what copyright is and have been conscious of it but I have never really had specific resources and tools for working around this. For example, something I have always struggled with is finding photos that I can use. I really valued the research we did as a class as well as the plethora of resources we were provided. Some of the resources that stand out to me that I will definitely make use of in the future include Unsplash, Smithsonian Learning Lab, and Pexels. I think after this week I have a better idea of what copyright is, the rules surrounding it, and the different resources that are made available for people.

The second thing I want to reflect on from this week is documentary “Most Likely to Succeed” which was directed by Greg Whiteley. I was actually very moved by this film. The film stirred something inside me that got me thinking for days after I watched it. I noticed myself mentioning it to those around me which is a clear sign of a great learning experience! There were many things that stood out to me in the film but I am going to list a few of the main points that I took away from it:

  • I love the idea of an exhibition night. I think an exhibition night would really motivate students. Having to show your work to your parents, peers, and colleagues is a great way to cultivate motivation and pride in your work.
  • I liked the idea that was brought forth about how creating the right environment for students will result in the ability for them to grow and prosper on their own. “It’s like a garden. You don’t paint the petals and attach the leaves to a flower, you create the right environment and conditions for it to grow.”
  • Sometimes letting kids fail will help them learn and grow – making mistakes is not a bad thing!
  • Soft skills! Ex: Teamwork, independence, communication, creativity, planning, leadership, grit/perseverance 

To end this blog entry, I want to leave everyone with some questions that I have been thinking about:

  • What kind of jobs do you think this learning is catered to/will create? It doesn’t seem like we currently have any jobs that this learning theory is catered for.
  • Do you guys agree with the statement that “creating something that wasn’t there before” is one of the greatest feelings of satisfaction and that its transformative?
  • How do we learn how to teach like this? These are very elaborate projects that connect so many aspects of learning and cross-curricular competencies.

Photo Credits: First photo from Unsplash, Second photo by Markus Winkler on Unsplash

Week 1 Reflection

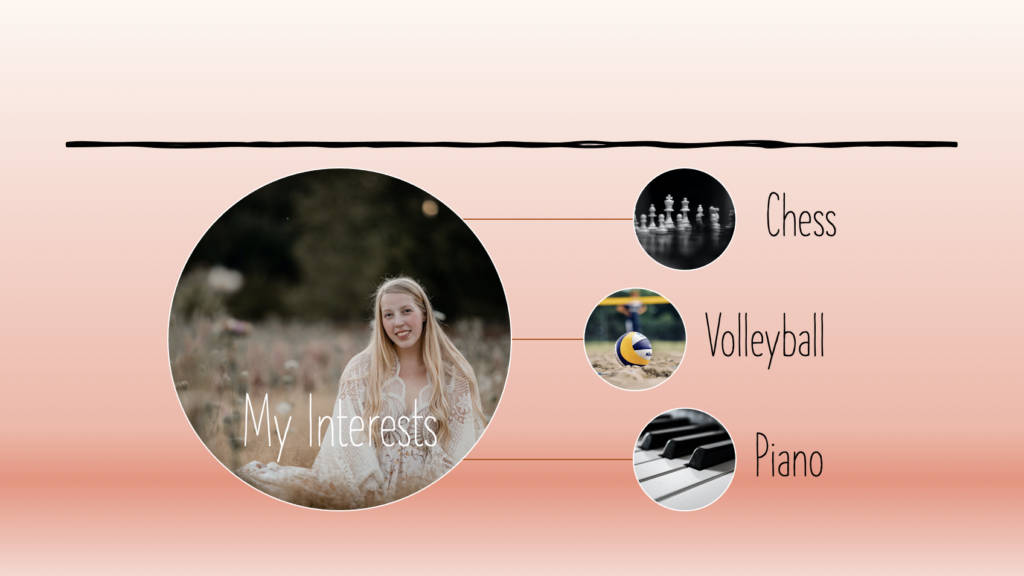
The first EDCI 336 class went surprisingly well. I am really looking forward to the inquiry project as we get to explore an individualized topic that interests us. I have decided to look at health and fitness for my project and am super excited to dive in and get started with my journey. In terms of learning, this week has required me to become acquainted with quite a few new learning platforms including WordPress, Mattermost, and our edtechuvic website. There is a learning curve but overall all these platforms are relatively easily to navigate. Mattermost and our class website were a breeze; however, WordPress required a bit more time. Dr. Paskevicius provided us with some good information to help us begin navigating these platforms; however, I also googled some additional sources that could be used to assist me (and others) in getting acquainted with these platforms. One specific thing I struggled with was figuring out how to have multiple blogs going on my website. I was able to find a really short and easy to follow video that helps explain how to set this up. I have attached this link, as well as a few other links, below in order to have them for future reference and to provide to others who may find them useful!

VIDEO RESOURCES:

LINKS: